Ever opened a PDF only to see a blank page, garbled text, or a scary ‘file is damaged’ error? That’s when you need PDF validation and repair. This guide is for anyone who works with PDFs—students, office workers, designers—and just wants the damn file to work. By the end, you’ll know how to find what’s wrong with a PDF and fix the most common issues using free or low-cost tools. No command-line wizardry required (though we’ll show you one neat trick if you’re feeling brave).
We’ll start with a quick online validator to check the file’s health, then move to desktop tools for deeper repairs. You’ll learn to spot problems like missing fonts, broken cross-references, and outdated metadata. By the end, you’ll have a solid workflow that saves you from re-creating entire documents from scratch.
What You’ll Need
- A corrupted or suspicious PDF file (the one you want to fix)
- A computer running Windows, macOS, or Linux
- Adobe Acrobat Pro (trial works too) – for Preflight validation
- QPDF command-line tool (free, install from qpdf.sourceforge.io)
- A web browser (for online checkers – we’ll use PDF-A Live or similar)
Step 1: Run a Quick Online Validation
Before diving into heavy tools, get a preliminary diagnosis. Upload your PDF to a free online validator like PDF-A Live (pdfa.org/pdfa-live) or the veraPDF validation service. These check if your PDF conforms to the PDF/A standard (an archival format), but they also catch basic structural errors.

Just drag and drop your file. In a few seconds you’ll see a report listing issues like ‘Missing cross-reference table’ or ‘Invalid object pointers’. Note the exact error messages—you’ll need them later. If the report says ‘File is valid PDF/A-1b’, your PDF is probably fine and the problem might be elsewhere (like your viewer).
Step 2: Check with Adobe Acrobat Pro Preflight
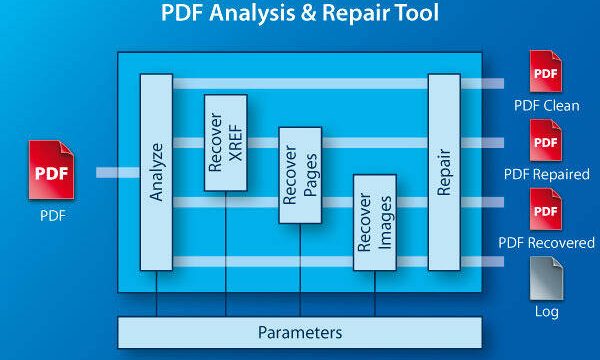
If you have access to Acrobat Pro, its Preflight tool is the gold standard for PDF validation. Open the PDF, go to Tools > Print Production > Preflight. Click ‘Analyze and fix’ (the wrench icon) and choose a profile like ‘PDF/A compliance’ or ‘Verify compliance with PDF/X-4’. Acrobat will check every nook and cranny of your file.
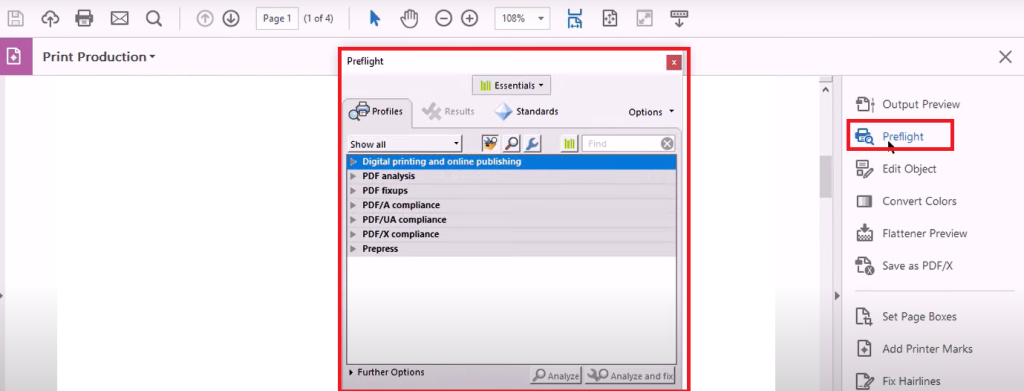
After the scan, you’ll see a list of problems classified as errors, warnings, or informational. Many errors can be fixed automatically—just select the error and click ‘Fix’. For example, ‘Missing CIDFont’ can be repaired by embedding the font. If the fix isn’t obvious, note the error so we can address it manually later.
Step 3: Repair Common Issues with QPDF
QPDF is a free command-line tool that can fix many structural PDF problems, like broken cross-references, linearization issues, and object stream corruption. Don’t be intimidated by the terminal—the commands are simple. First, install QPDF from the official site. Then open your command prompt (Windows) or terminal (Mac/Linux).
Run this basic repair command: qpdf --linearize input.pdf output.pdf. This creates a new, linearized version of your PDF that often resolves streaming and random access problems. If that doesn’t work, try qpdf --replace-input input.pdf to attempt in-place repair (backup your original first!). For severely corrupted files, use qpdf --static-id --no-original-object-ids input.pdf restored.pdf to force regenerate IDs.

After running QPDF, open the output file and check if it’s readable. If there were object streams, you might also try qpdf --no-obj-streams input.pdf output.pdf to flatten them, which can fix issues in older PDF viewers.
Step 4: Fix Font and Image Problems
Sometimes a PDF looks fine structurally but has missing fonts or broken images. For fonts, open the PDF in Acrobat Pro and go to File > Properties > Fonts. If any fonts are listed as ‘Embedded Subset’ but are actually missing, you can embed them again using the Preflight ‘Repair fonts’ profile. For images, if they appear as gray boxes, the image stream might be damaged. Use QPDF’s --decode-level all option to decompress all objects, then re-compress: qpdf --decode-level all --compress-streams zlib input.pdf decompressed.pdf. Sometimes this forces the PDF reader to re-render images.

Step 5: Re-save and Test in Multiple Viewers
After any repair, always re-save the PDF with a new name (File > Save As). Then test it in at least two different PDF viewers: Adobe Acrobat Reader (free) and a browser like Chrome or Firefox. If it opens perfectly everywhere, you’re golden. If only one viewer shows issues, the problem might be that viewer’s implementation, not your file. For safety, also run the online validation again to confirm no new errors were introduced.

Common Pitfalls
- **Saving over the original**: Always work on a copy. If QPDF or Preflight messes up, you don’t want to lose the original. Keep a backup named ‘original.pdf’ before trying anything.
- **Ignoring warnings**: Warnings often turn into errors later. For example, a warning about ‘non-compliant structure tree’ might cause accessible PDF readers to fail. Better to fix warnings now than regret later.
- **Over-repairing**: Some tools aggressively rebuild the PDF, removing metadata, bookmarks, or annotations. After repair, check if the document still has its intended features. If not, try a less aggressive approach or manually re-add important elements.
Where to Next
Now you know how to resurrect almost any dead PDF. Next, you might want to explore PDF automation—like using Python scripts to batch-repair a folder full of files. Or dive into the official PDF specification (ISO 32000) if you’re a glutton for punishment. But for everyday use, the tools above will handle 90% of your PDF headaches. Keep ’em bookmarked!