Ever opened a PDF only to find it’s corrupted, won’t load, or shows gibberish? It’s frustrating, especially when you need that file for work, school, or an important application. The good news is you don’t need expensive software or technical skills to fix it. Online PDF repair tools let you restore your file right from your browser—no downloads, no hassle.
By the end of this guide, you’ll know exactly how to pick a reliable online tool, upload your corrupted PDF, fix it, and download the repaired version. We’ll cover common pitfalls too, so you don’t waste time or risk your privacy. If you prefer working on your phone, check out our pdf repair for android guide. For serious corruption, our free corrupted pdf recovery guide has extra tips.
What You’ll Need
- A corrupted or damaged PDF file (under 50MB for most free tools)
- A stable internet connection
- A modern web browser (Chrome, Firefox, Edge, or Safari)
- Basic file management skills (saving and downloading files)
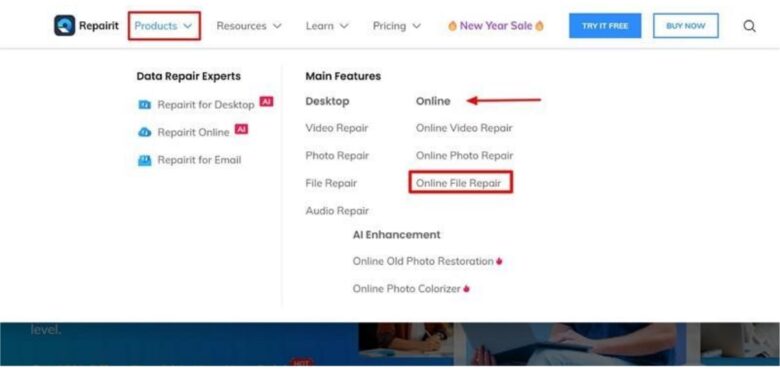
Step 1: Choose a Reputable Online PDF Repair Tool
Not all online PDF repair tools are equal. Some can’t handle heavy corruption, others have file size limits, and a few might mess with your privacy. Stick with well-known, secure tools. I recommend iLovePDF, Smallpdf, or PDF24. They’re free for small files and don’t store your documents longer than needed. For very large files, look into desktop options or our repair pdf under 500mb guide.
Step 2: Upload Your Corrupted PDF
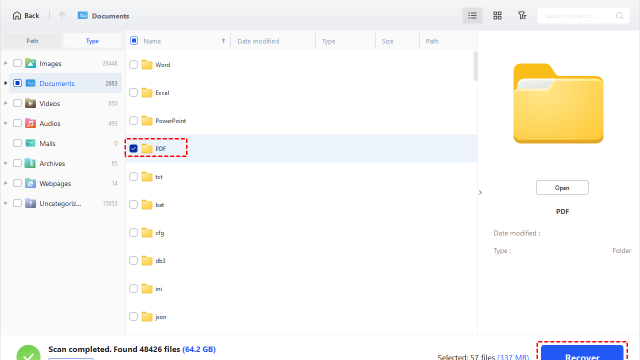
Once you’re on the tool’s website, click the “Upload” or “Choose File” button. This opens your file explorer. Navigate to your corrupted PDF and select it. Most tools accept drag-and-drop too—just grab the file from your folder and drop it onto the browser window. Look for a confirmation message that the file is uploading. If the file is too large, you might get an error. For bank statements or official documents, see our recover bank statement pdf guide.
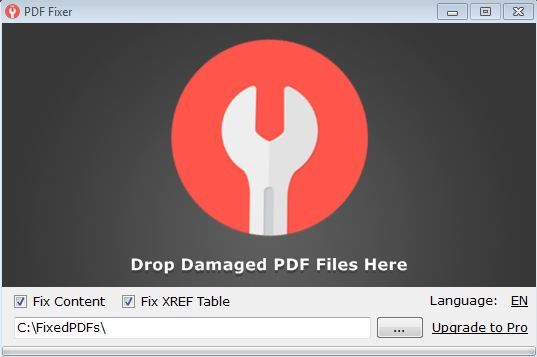
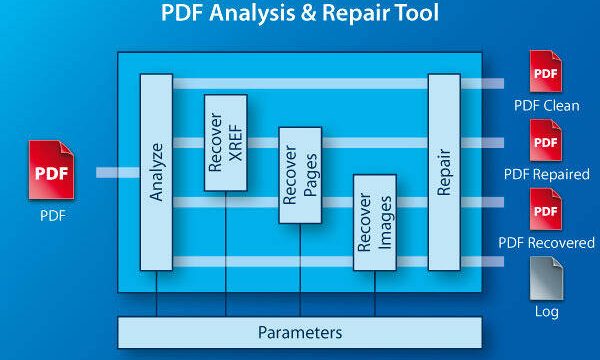
Step 3: Start the Repair Process
After upload, a “Repair” or “Fix PDF” button appears. Click it. The tool processes your file—this may take a few seconds to a minute. Do not close the tab or refresh the page. Some tools show a progress bar. If your PDF has a specific error like “invalid header”, the tool might handle it automatically. Our repair pdf invalid header article explains deeper fixes.
Step 4: Download the Repaired PDF
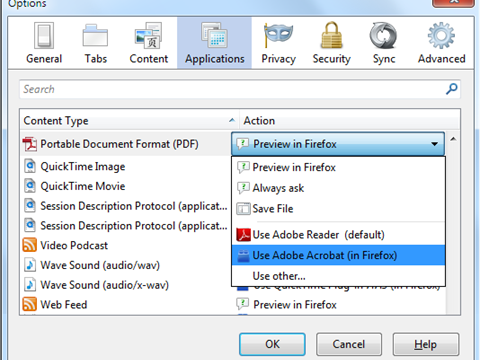
Once complete, a download link or button appears. Click it to save the repaired PDF to your computer. The file is usually named “repaired_file.pdf” or similar. Check its size—it should be close to the original. Open it in a PDF viewer to verify it works. If symbols appear instead of text, the repair might not have fixed encoding issues. Our pdf symbols instead of text fix guide can help.
Common Pitfalls
- File size limits: Free online tools often cap at 50–100MB. If yours is bigger, use a desktop tool or split the PDF first.
- Privacy concerns: Never upload sensitive documents (passwords, legal contracts) to unknown sites. Use tools with clear privacy policies or encrypted connections (HTTPS).
- The repair fails: Some corruption is too severe for online tools. Try a different tool, or if the PDF is from a known source, redownload the original. For malware-damaged files, see our repair pdf after malware section in another guide.
Where to Next
If your PDF is still broken after trying this guide, don’t give up. Try our fix damaged pdf tutorial for more advanced methods. You can also learn how to repair PDFs from backup sources like email, OneDrive, or Dropbox. For command-line enthusiasts, the command line pdf repair guide might be your speed. Remember, most PDF problems are fixable—you just need the right tool.