Ever opened a scanned PDF only to find the text is a blurry mess, pages are skewed, or the document just won’t cooperate? You’re not alone. Scanned PDFs can be tricky, but the good news is you can often fix them yourself without expensive software. This guide is for anyone who’s stuck with a low-quality scan—whether it’s a old receipt, a contract, or a book excerpt. By the end, you’ll have a clean, readable PDF that looks almost like it was born digital.
We’ll walk through simple steps using mostly free tools. You’ll learn how to sharpen images, rerun OCR, and fix common scan issues. No technical degree needed—just a bit of patience and the willingness to try.
What You’ll Need
- A computer (Windows or Mac) with internet access
- The scanned PDF file you want to repair
- Optional: Adobe Acrobat Pro (free trial works for this task)
- Free alternatives: PDF24 Tools, OCR.space, or GIMP for image adjustments
Step 1: Assess the Damage
Open the PDF and take a close look. Is the text fuzzy? Are pages rotated? Is there a lot of background noise? Knowing exactly what’s wrong helps you choose the right fix. For example, if text is unreadable due to low contrast, you’ll want to adjust brightness and contrast. If the file is completely garbled, you might need to restore damaged PDF first.
Step 2: Use Adobe Acrobat’s Built-In Repair (or a Free Alternative)
If you have Adobe Acrobat, go to Tools > PDF Standards > Repair PDF. This scans the file structure and fixes basic errors. For a free option, try PDF24 Tools’ “Repair PDF” feature—it works online. Upload your file, run the repair, and download the fixed version. This step often resolves unexpected errors like missing pages or file corruption. For more advanced issues, see our guide on PDF document repair.
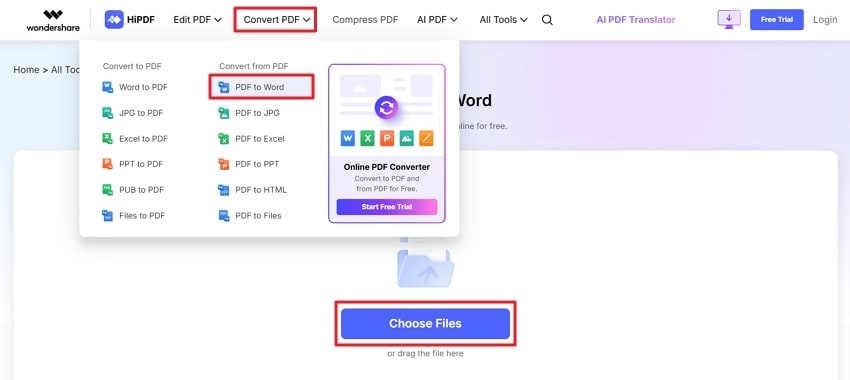
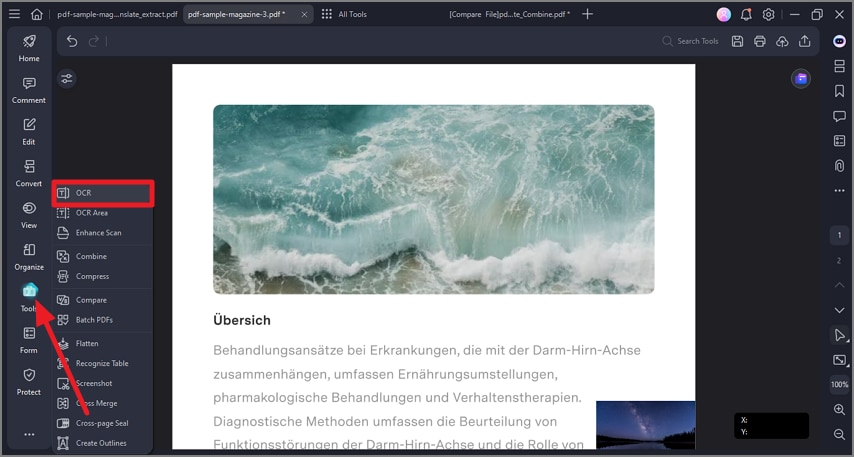
Step 3: Run OCR on the Scanned PDF
Scanned PDFs are basically images, so text isn’t searchable or selectable. OCR (Optical Character Recognition) converts those images into actual text. Adobe Acrobat has a built-in OCR tool under Enhance Scans > Recognize Text. For a free alternative, use OCR.space—just upload your PDF and get a text layer added. This alone can fix many readability issues. Pro tip: choose “Editable Text & Images” to keep the original look.
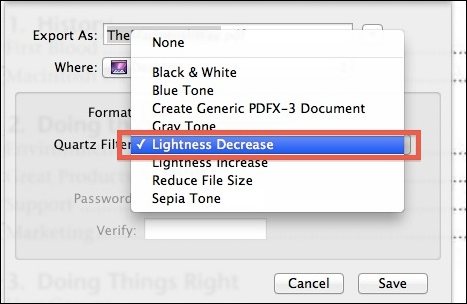
Step 4: Adjust Image Settings (Brightness, Contrast, and Deskew)
If pages look too dark, too light, or are crooked, tweak the image settings. In Adobe Acrobat, use Enhance Scans > Custom Settings to play with contrast and brightness. For free, GIMP works great: open the PDF as images, then use Colors > Brightness-Contrast. Deskew (straighten) with Layered > Transform > Arbitrary Rotation. These adjustments make a huge difference in readability.
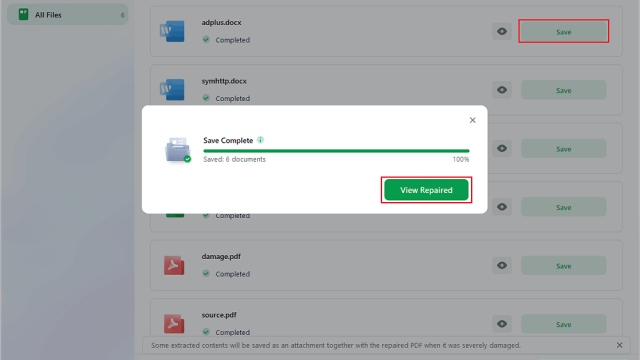
Step 5: Save and Test Your Repaired PDF
Once you’re happy, save a copy. Use File > Save As (or Export) and choose PDF. Test it by opening on different devices and searching for a word. If the OCR worked, you should be able to highlight text. If something’s still off, go back to step 3 or 4. And if the file won’t open at all, you might need to repair PDF after incomplete download.

Common Pitfalls
- Overcompressing the PDF after repair can ruin the quality. Always use a high-quality setting.
- OCR software often misreads handwriting or unusual fonts. If your document has these, consider manual proofreading.
- Skipping the deskew step leaves pages slightly rotated, which makes text look jagged. Always straighten first.
Where to Next
Now that your scanned PDF is readable, you might want to make it searchable or extract specific sections. Check out our guides on restore damaged PDF for deeply corrupted files, or repair PDF streams if you’re dealing with weird compression glitches. And if you ever need to fix a scanned PDF from a scanner app, the same steps apply. Happy reading!