So your PDF is corrupted, and you need to fix it fast—but you’re worried about uploading sensitive documents to some random website. I get it. This guide is for anyone who wants to repair a PDF online without compromising privacy or security. By the end, you’ll know exactly how to choose a secure service, prepare your file, and get a working PDF back—all while keeping your data safe.
We’ll walk through the whole process step by step, from evaluating whether an online tool is right for your file, to picking a trustworthy service, to downloading the repaired version. No jargon, no fluff—just practical steps you can follow right now.
What You’ll Need
- A corrupted PDF file
- A web browser (Chrome, Firefox, Edge, etc.)
- An internet connection
- Optionally, a free redaction tool (like Preview on Mac or a simple PDF editor) if your PDF contains sensitive info
Step 1: Assess Whether an Online Tool Is Safe for Your PDF
Before you do anything, think about what’s in that PDF. If it’s a personal letter or a public document, you’re probably fine. But if it’s a contract with your social security number or proprietary business data, consider offline methods like pdf recovery or acrobat pdf repair instead. No online tool is 100% risk-free, so use your judgment.
Step 2: Choose a Secure Online PDF Repair Service
Not all online PDF repair tools are created equal. Look for these security features: HTTPS in the URL (the little padlock icon), a clear privacy policy stating that uploaded files are deleted after processing, and positive user reviews. Some of the most reputable services include PDF24, Smallpdf, and iLovePDF—but always double-check their current security practices. For a curated list, check out our guide to best online pdf repair.

Step 3: Prepare Your PDF for Upload
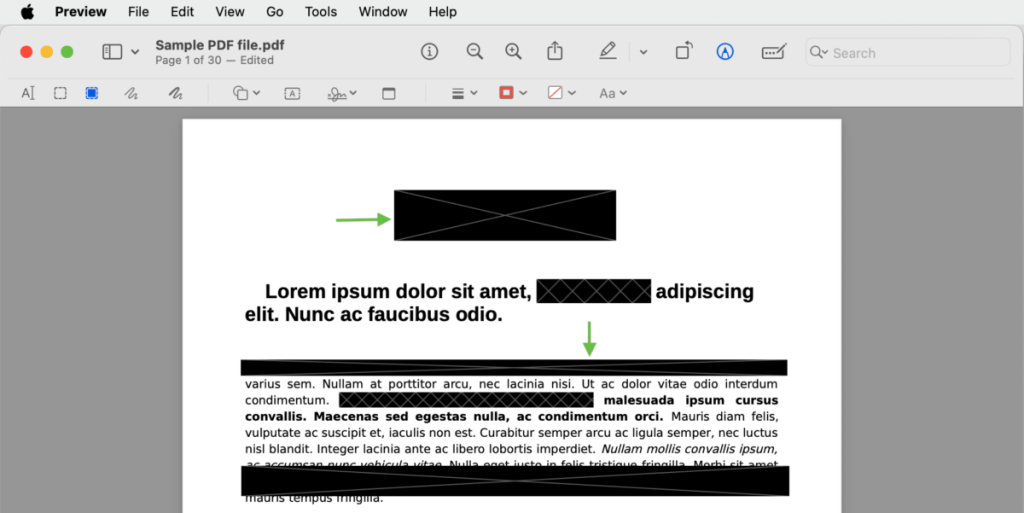
If your PDF contains any personal details you don’t want to share, redact them first. Use a free tool like Preview on Mac (Tools > Redact) or a simple redaction feature in a PDF reader. Highlight the text you want to hide, apply the redaction, and save a copy. Keep the original backup too—just in case the repair messes something up. Then rename the file to something generic (like ‘document.pdf’) to avoid drawing attention.
Step 4: Upload and Repair
Head to the service you chose. Most have a big ‘Upload’ or ‘Choose File’ button. Select your prepared PDF, then look for an option that says ‘Repair’ or ‘Fix’. Click it and wait. The process usually takes a few seconds to a minute, depending on file size. Avoid closing the tab or refreshing until it’s done. Some services also offer additional options like downloading the repaired file as a ZIP or as separate pages.
Step 5: Download and Verify the Repaired PDF
Once the repair finishes, download the file immediately. Then open it with your favorite PDF reader. Check that all pages are present, text is selectable, and images render correctly. If something still looks off, try a different tool from our list. Also, use these pdf repair tips to confirm the file integrity—like checking file size and trying to print it. If all good, you’re done!
Common Pitfalls
- Uploading highly confidential PDFs without redacting: Even reputable services could have breaches. Always strip sensitive data first.
- Not reading the privacy policy: Some services keep copies of your files for up to 24 hours. Make sure they delete them after processing.
- Assuming all online tools actually repair: Some just rewrap the file without fixing underlying corruption. If one tool fails, try another—or consider a free pdf repair for windows tool offline.
Where to Next?
Now that you’ve successfully repaired your PDF, you might want to explore other ways to handle stubborn files. Check out our guides on fixing specific issues like pdf thumbnail not showing fix or recover corrupted pdf. And remember, for truly sensitive documents, offline tools are always the safest bet. Happy repairing!