You’ve got a PDF that needs to go to the printer, but it’s acting up — fonts look weird, images are blocky, or the colors are all wrong. This guide is for anyone who’s ever hit ‘Print’ and regretted it. By the end, you’ll have a polished, print-ready PDF that looks exactly as you intended, without wasting paper or ink on test prints.
Whether you’re a student printing a report, a designer prepping a flyer, or an office worker sending out invoices, these steps will fix the most common PDF printing headaches. We’ll use free and built-in tools (like Adobe Acrobat Reader and online repair services) so you don’t need expensive software.
What You’ll Need
- The problematic PDF file
- A computer (Windows, Mac, or Linux)
- Adobe Acrobat Reader (free) or a PDF editor like Adobe Acrobat Pro (trial works)
- Optional: an online PDF repair tool for quick fixes
- A printer (to test, but you can skip if you just want the fixed file)
Step 1: Identify the Problem
Before you fix anything, figure out what’s wrong. Open the PDF in Acrobat Reader and look for these telltale signs:
- Missing or garbled text — fonts might not be embedded.
- Pixelated or blurry images — resolution is too low for printing.
- Colors look different on screen vs. print — color profile issue.
- Pages are cut off or margins are off — page size mismatch.
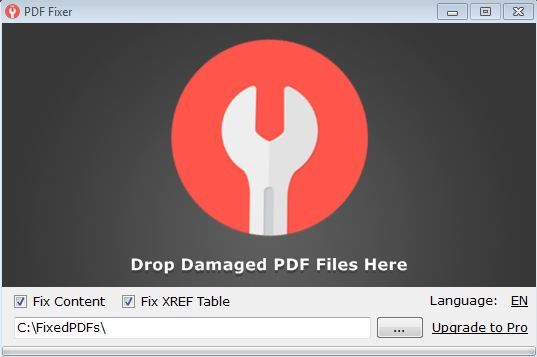
Step 2: Use a PDF Repair Tool
If the PDF is corrupt or has structural issues, start with a dedicated repair tool. You can use an online service like our own to repair pdf online free — it handles most common corruption without watermarks. Alternatively, try the built-in PDF repair in Adobe Acrobat Pro: go to File > Export > and choose a different format (like Word), then convert back to PDF. That often cleans up errors.
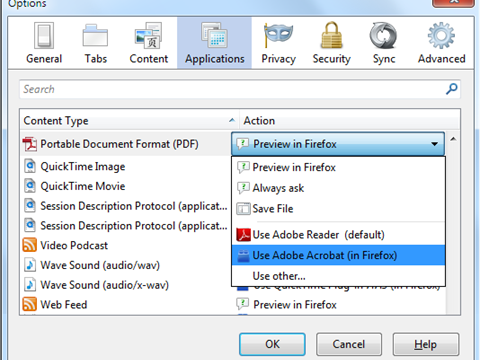
Step 3: Fix Font Embedding
Missing fonts are a top cause of printing disasters. In Acrobat Pro, open the PDF and go to File > Properties > Fonts. You’ll see a list. If any fonts are marked as ‘Embedded Subset’ or not embedded at all, you can fix them by going to PDF Standards > Preflight. Under ‘Preflight Profiles’, choose ‘Fix problems with fonts’ and run the fix. For a free option, upload the PDF to an online service like the one we use for invalid pdf repair — it’ll re-embed standard fonts.
Step 4: Check Image Resolution
Printers need at least 300 DPI for clear images. To check, open the PDF in Acrobat Pro, go to Print Production > Output Preview, and view the image info. If images are below 300 DPI, you’ll need to replace them with higher-resolution versions in the original document, then re-export. If you only have the PDF, try a tool that can extract and upscale images — but results vary. For scanned PDFs, use an OCR tool to improve quality. Our guide on fix corrupted pdf online free no watermark can help recover blurry scans.
Step 5: Set the Correct Color Profile
Screen colors (RGB) don’t always match print colors (CMYK). If your PDF is meant for a commercial printer, convert it to CMYK. In Acrobat Pro, go to Print Production > Convert Colors. Choose ‘CMYK’ as the destination profile. For home printing, RGB is usually fine, but ensure your printer settings match. Avoid mismatches by using the preflight profile ‘Fix problems with color conversion’.

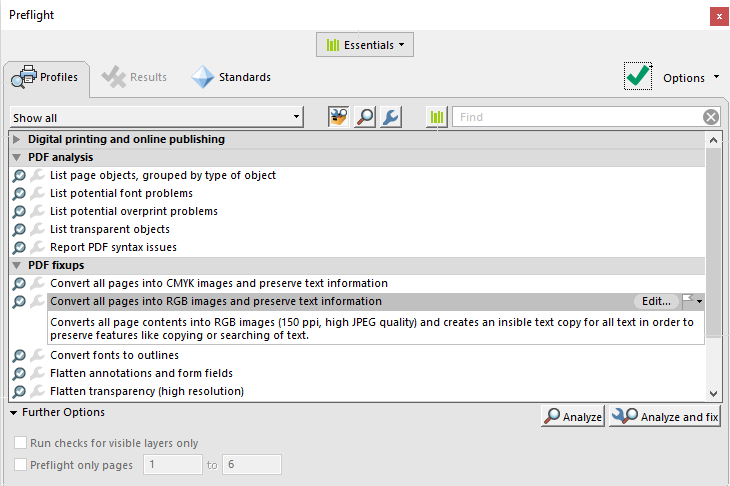
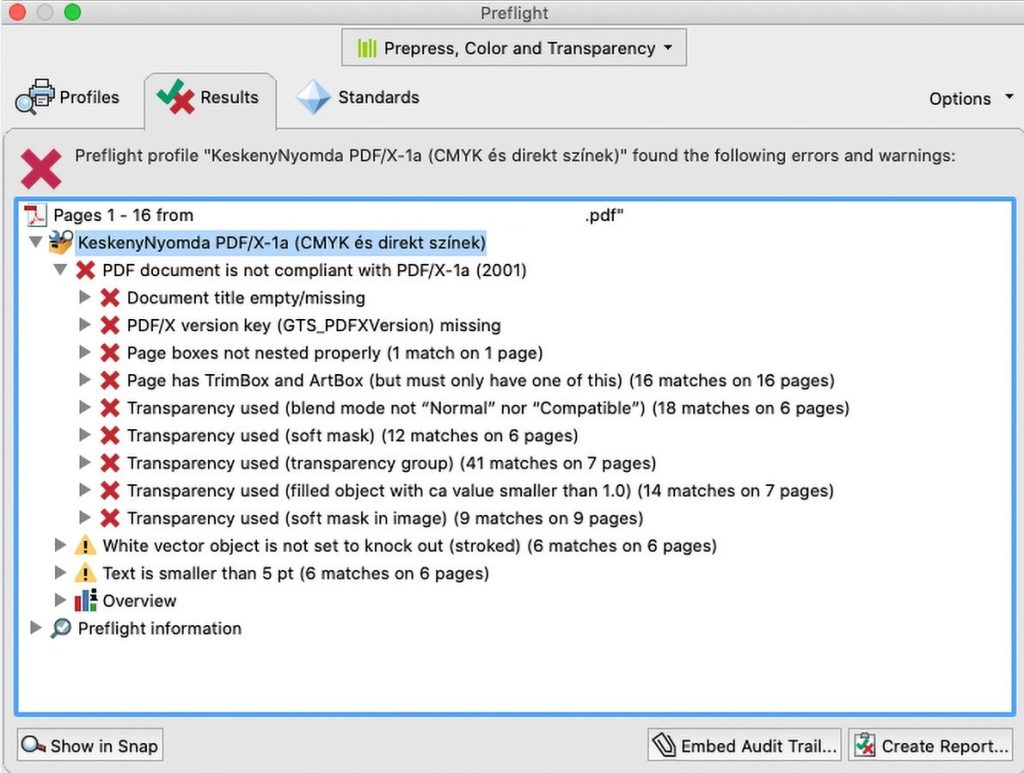
Step 6: Run a Preflight Check
This is the safety net. In Acrobat Pro, go to Tools > Print Production > Preflight. Choose a profile like ‘PDF for print (high quality)’ and run it. It’ll flag issues like transparency, overprint, and dirty objects. Fix each one by following the prompts. For a simpler approach, use an online service that offers a repair pdf stream — it can detect and fix stream errors that often cause printing glitches.
Step 7: Save as a Print-Optimized PDF
Final step: Save the repaired PDF with print settings. In Acrobat Pro, go to File > Save As Other > Optimized PDF. Choose ‘Standard’ for online use, or ‘Press Quality’ for professional printing. This flattens transparency and embeds all fonts. If you’re using a free tool, use the ‘Export as PDF’ option after editing in a word processor. To fully recover a damaged file, you might need a specialized tool to restore pdf file — but for most print jobs, these steps are enough.
Common Pitfalls
- Forgetting to embed fonts: Always check font properties before printing. A single missing font can ruin the whole document.
- Ignoring image DPI: Screenshots from the web are often 72 DPI and will print blurry. Upscale or replace them.
- Color profile mismatch: Converting RGB to CMYK can shift colors. Always soft-proof in Acrobat before printing.
I once printed 200 brochures with missing fonts — looked like a ransom note. Now I always run a preflight first.
Sarah, graphic designer
Where to Next
Your PDF should now be print-ready. If you still run into issues, check out our guides on specific problems like repair pdf stream errors or how to handle corrupt files with our invalid pdf repair tips. And if you ever need to recover a seriously damaged file, our restore pdf file guide has your back. Happy printing!