If you’ve ever exported a spreadsheet from Excel to PDF and ended up with blank pages, garbled text, or missing data, you’re not alone. Excel-to-PDF conversion can be finicky, especially when complex formatting, merged cells, or custom fonts are involved. This guide is for anyone who needs to repair a PDF exported from Excel—whether you’re a business analyst, a student, or just someone trying to share a clean report. By the end, you’ll have a fully functional PDF that looks exactly like your original spreadsheet.
We’ll cover the most common issues: blank pages, broken tables, missing numbers, and font problems. You’ll learn how to re-export properly, use free repair tools, manually fix file structure errors, and validate your results. The steps work whether you’re on Windows or Mac, and you won’t need expensive software. Let’s turn that broken PDF into a polished document.
What You’ll Need
- The original Excel file (if available)
- The corrupted PDF exported from Excel
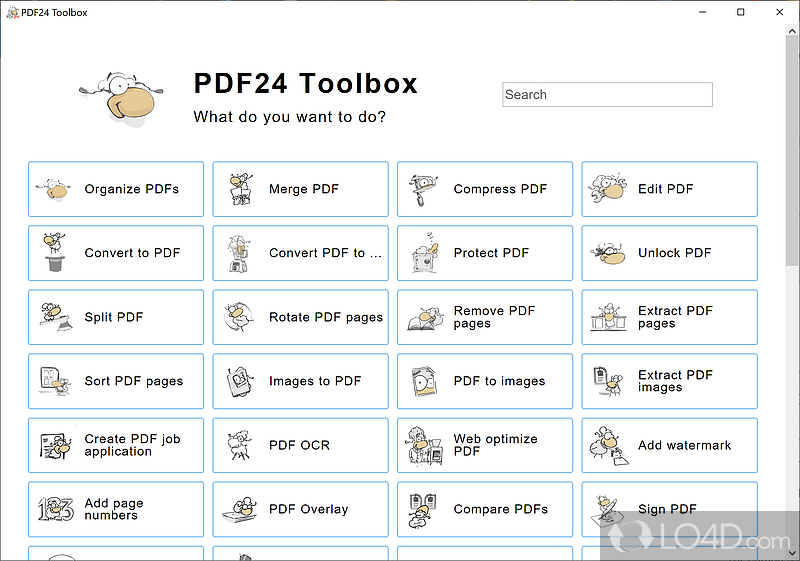
- A free PDF tool like PDF24, Smallpdf, or the Adobe Acrobat trial
- A plain text editor (Notepad, Notepad++, or VS Code) for manual fixes
- An internet connection for online tools and validation
Step 1: Re-Export from Excel Properly
Before diving into heavy repairs, try re-exporting your Excel file with the right settings. Often the issue is in how you exported. Open your spreadsheet, go to File > Save As > PDF (or Export > Create PDF/XPS). Click Options and make sure you’re exporting the entire workbook or your selected sheet. Under ‘Publish what’, choose ‘Active sheet(s)’ to avoid blank pages. Uncheck ‘Fit to paper width’ if you want to preserve column widths. If you have custom fonts, check ‘Document properties’ and ‘Document structure tags for accessibility’ to embed font info. This simple re-export can fix many problems.

If the re-export still looks bad, try using Excel’s ‘Print’ function instead. Go to File > Print, choose ‘Save as PDF’ from the printer dropdown, and adjust scaling to ‘Fit All Columns on One Page’. This often gives better results for wide tables. Save with a new filename to avoid overwriting your original.

Step 2: Use a Dedicated PDF Repair Tool
If re-exporting doesn’t work, the PDF file itself may be corrupted. Free tools like PDF24, Smallpdf’s Repair PDF, or online services can fix common errors. I recommend PDF24’s free PDF repair tool because it handles Excel-generated PDFs well. Upload your file, run the repair, and download the fixed version. For more stubborn issues, the best PDF repair tool like Adobe Acrobat Pro can rebuild corrupted files, but the free options are worth trying first. Run a quick validation after repair using a tool like PDFCheck to confirm the file is clean.
Step 3: Manual Fixes with a Text Editor
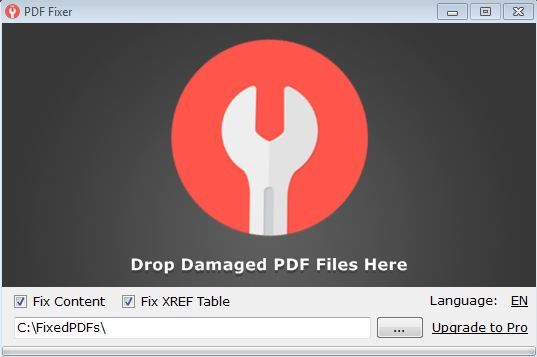
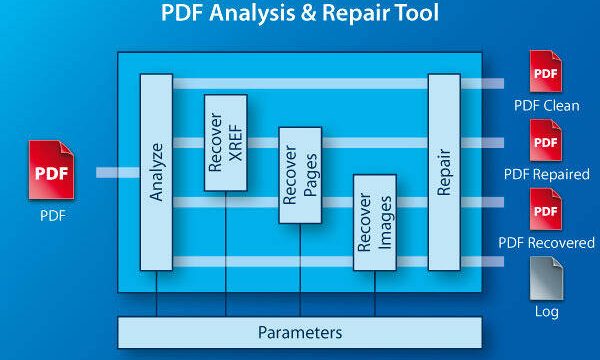
Some corruption comes from internal structure errors, like a broken cross-reference table (XREF). If the PDF opens but shows garbled text or missing pages, manually editing the XREF can help. Open the PDF in a plain text editor (Notepad++ is great). Scroll near the end and look for ‘xref’ followed by numbers. If entries are missing or misaligned, you can try a malformed PDF repair by replacing the xref section with a fresh one generated by a tool like PDFFixer. For detailed instructions, see our XREF table repair guide. This step is advanced, but it works when automated tools fail.

Step 4: Validate and Repair with Online Services
After manual tweaks, run your PDF through an online validator to catch remaining issues. Sites like PDF Tools or iLovePDF’s Repair feature can fix additional glitches. Upload your file and let them check the structure. Some online tools also strip problematic elements like incorrect metadata or embedded fonts. For a comprehensive check, follow our validation and repair guide to ensure your PDF conforms to the specification. This step is especially important if you plan to share the file publicly.

Step 5: Final Review and Save
Open the repaired PDF in your preferred viewer (Adobe Acrobat, browser, or Preview). Check for any remaining issues: are all rows and columns visible? Are numbers and text legible? Test printing a page to ensure it renders correctly. If the file is still problematic, go back to Step 3 and re-examine the XREF table or try a different repair tool. Once satisfied, save the file with a sensible name and consider converting it to a more stable format like PDF/A if you need long-term preservation. Now you have a clean PDF ready for presentation.
Common Pitfalls
- Using ‘Print to PDF’ instead of ‘Export’. Printing often ignores Excel’s page breaks and font embeddings, leading to oversized layouts and missing text.
- Not embedding custom fonts. If your Excel uses a rare font, the PDF may show fallback characters or blanks. Always check ‘Embed fonts in the file’ during export.
- Overlooking file size. Very large Excel files with many images or rows can create corrupted PDFs during conversion. Try splitting the spreadsheet into smaller chunks before exporting.
Where to Next
If your repaired PDF still shows odd behavior—like missing pages or strange characters—it might be a systemic issue. Check out our guides on why your PDF is unreadable for deeper diagnostics, or explore malformed PDF repair for structural defects. For ongoing maintenance, the validation and repair guide is a great resource. Happy exporting!